Construction of a gable roof, part 4
 Gable wall.
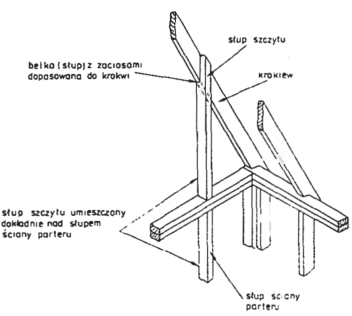
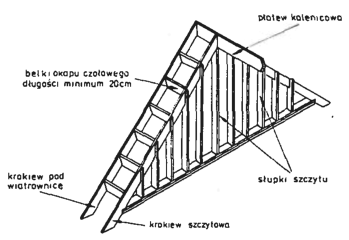
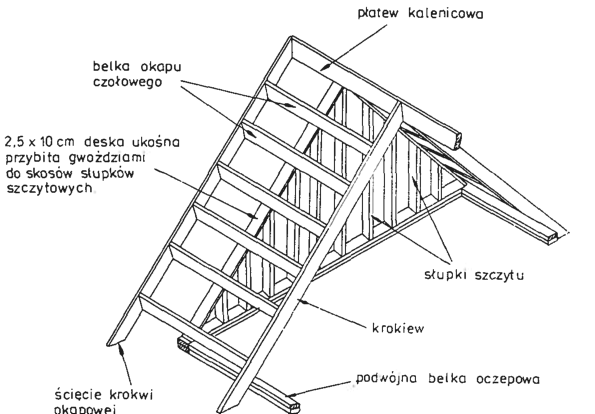
The gable is the side of the cottage, which rises to the very ridge of the house. Gable wall posts should be nailed directly above the posts of the ground floor walls.
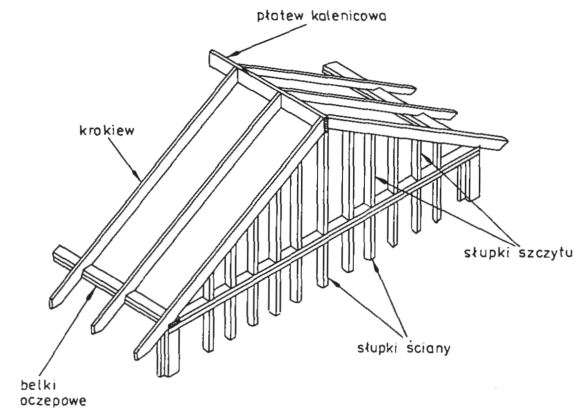
They should be provided with cut-outs matching the rafters at the joint.
The lower plane of the notch and the upper edge of the rafters are cut at the angle of the roof slope.

 The eaves under the gable make the building more attractive and provides a significant rain cover for windows and doors. If the hood has 20 cm or less in length, it is for its construction you can use rafter nails nailed to the extreme rafters of the roof.
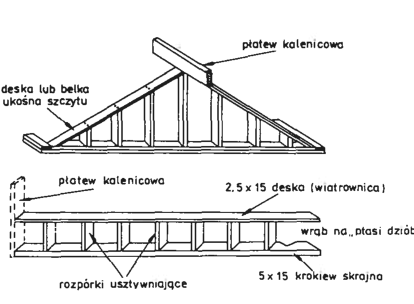
Larger hoods require stronger fixation.
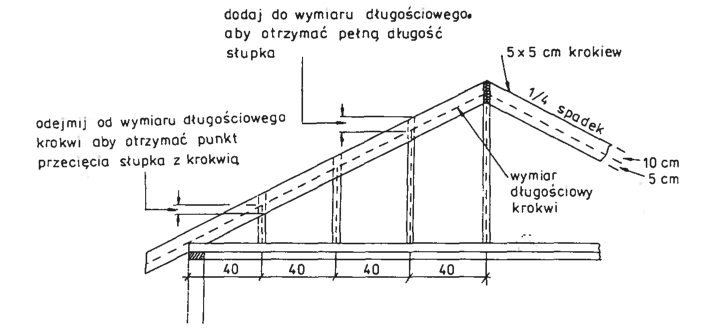
HOW TO DETERMINE THE GREAT WALL AND Eaves?
– The ridge purlin should be extended to the distance of the desired protrusion of the gable eaves;
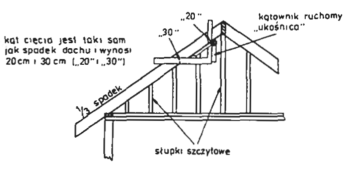
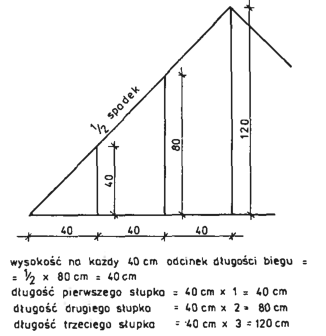
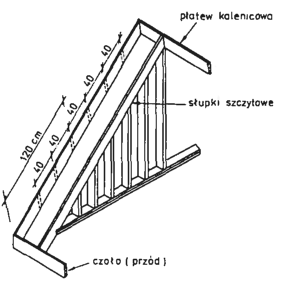
– determine the length and slope of the gable wall studs as shown in the drawing;
– nail the top board to the tops of the wall studs, we measure and mark the position of the rafter legs on each side of the gable rafters, starting from the lower edge of the rafters. Do not forget to take into account the thickness of the framing board.
 How to make a designed rafter-collar beam roof truss without the use of a roof angle?
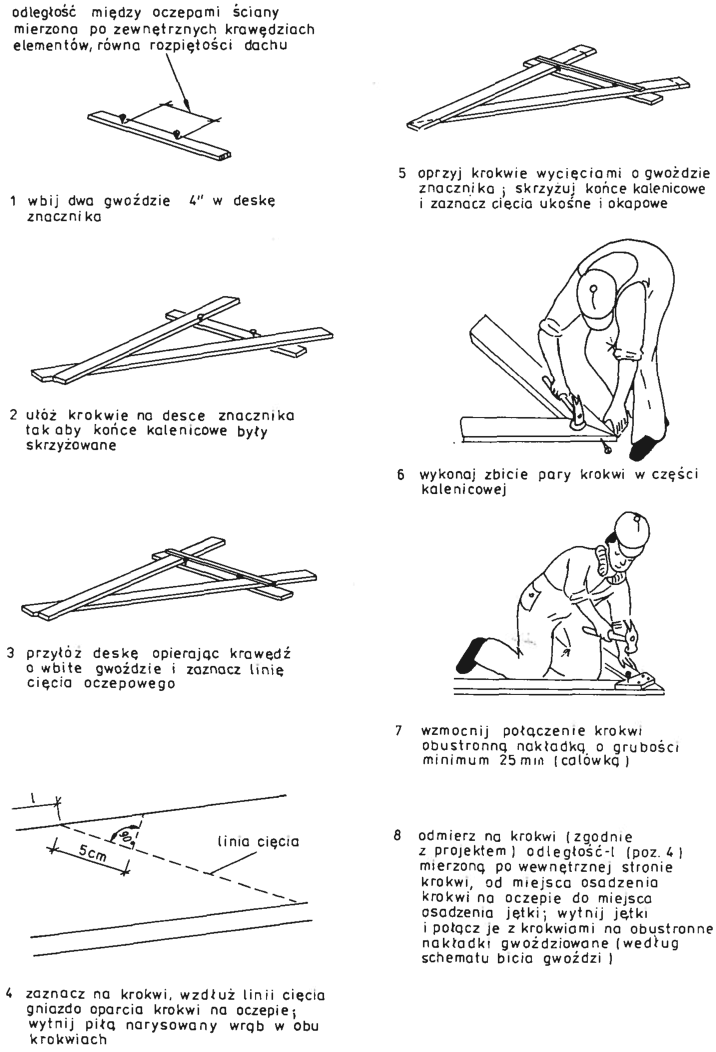
– you should take a thick plank 50 mm and length o 100 cm longer than the span of the roof, that is, greater than the distance between the caps of the wall measured along the outer edges of these elements; o mark the span of the roof on the board and hammer two nails in these places 100 mm (4-inch);
– we take two rafter boards with a cross section 50 x 160 mm – 50 x 180 mm and put them on the marker board, resting the place of the future cap cutout against two nails, while the upper sections of the rafters are crossed like this, so that you can mark the diagonal cut of the rafters in the ridge part of the roof;
– we put a straight board to the nails and mark the top edge of the cap cut with lines;
– after taking the measure in your hand (meters) we mark the edges of the cap cut, that is, the nests of the bird's beak, allowing the rafters to rest on the wall cap. We will make a socket cutout this way;
– we put the rafter boards down again, that the nests rest on the nails, while the upper sections of the rafters are crossed and their diagonal cuts are marked. In this position, we also mark the ends of the bevelling of the eaves ends of the rafters.
ATTENTION! After the performed activities, we knock down the rafter-collar beam, previously marking the position of the collar flaps in accordance with the design. After installing the roof truss, the rafter (resting on the socket on the cap) we nail it to the cap 70 x 200 mm driven into a pre-drilled hole.