General rules for laying parquet
In the case of herringbone laying, with rows running along the walls, Two rows of planks - right and left - are placed on the coated substrate at once, while controlling the right angle between the rows to be laid. The next rows are added to the already arranged ones, only checking the right angle from time to time. By arranging the next rows in this way, you come to the opposite wall. The last row requires cutting the planks at an angle again. 45° in distance 1 cm from the wall. After arranging the planks throughout the room and securing them with wedges against shifting from the last row to be laid, there should be the so-called. download, i.e. pressing the planks towards the center by means of a lever and elimination of any gaps. In the process of pulling into the gap between the last one, with a row of staves and the wall, wedges must be inserted. Then, wedges can be tapped in at the three remaining walls.
After these activities, a visual inspection of the entire lined surface takes place and, if necessary, the planks are tightened on one of the sides if there are gaps at the joints.. This operation is generally unnecessary in the case of laying good quality planks.
Recently, it is quite common to arrange the floor in a different form of a herringbone pattern. It is based on this, that the laying begins from the corner of the room and arranges the rows diagonally. It is a simplified form, that the staves are cut at right angles, more precisely, the stave for the first two rows is circular (drawing).
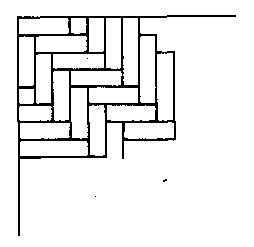
Drawing. An example of laying a herringbone plank along the diagonal of the room using the method.
All variations of the brick pattern are easier to install, because they require perpendicular trimming of the staves, and they are not so "sensitive" to the accuracy of the dimensions of the width of the planks. The way of laying brick patterns is similar to laying a herringbone pattern.
In rooms with an area of over 20 m², when the laying time can take and several days, we should start laying the floor from the inside. For this, an axis must be designated, from which we will start laying both sides. The axis does not necessarily have to be in the center of the room. However, in order to avoid material losses, it should be located at a distance equal to a multiple of the width of the rows to be laid from one of the walls. This axis, of course, should be parallel to this wall. After determining the position of the axis, a cord is stretched, which is an indicator of the correctness of laying the first two rows (drawing).
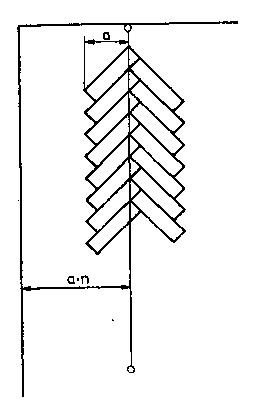
Drawing. An example of how to measure and lay herringbone planks in larger rooms
Further laying is done in the same way as when starting against the wall, however, further rows are added alternately on both sides to the two rows.
Laying patterned planks is difficult for an amateur and will not be discussed here.